Part 6a Building the GUI
Design Goals
The screen design for this tutorial is to maximize the usage of the screen area. The top bar will contain the menu and the tool bar to minimize the space taken up by them. The rest of the screen will have a tabbed layout with a tab for each type of thing we want to do.
Setup
-
Create the directory gui6 in linuxcnc/configs.
-
Start the Glade Interface Designer and save the project in the gui6 directory as gui6.glade.
Containers
-
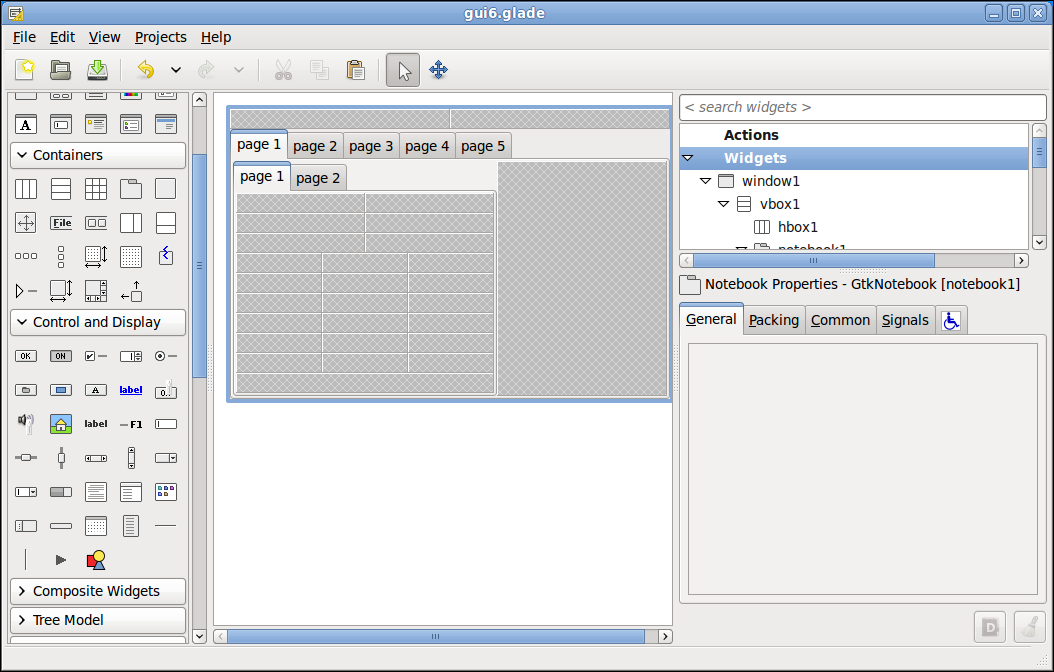
Start with a Toplevel Window and add a Vertical Box Container to window1 with two items.
-
Add a Horizontal Box Container with two items to the top box.
-
Add a Notebook Container to the bottom box and add two more pages by right clicking on the last page after selecting it and pick Insert Page After.
-
Add a Horizontal Box Container with two items to page 1.
-
Add a HAL_HBox Container with one item to the left box.
-
Add a Notebook Container to the HAL_HBox remove page 3 and set the Width Request: to 175.
-
Add a Vertical Box Container with 4 items to page 1 in the notebook in the HAL_HBox.
-
Add a Table Container with 3 Rows and 2 Columns to the top box.
-
Add a Table Container with 3 Rows and 3 Columns to the middle two boxes.
Your project should look like this now.
Buttons and Labels
-
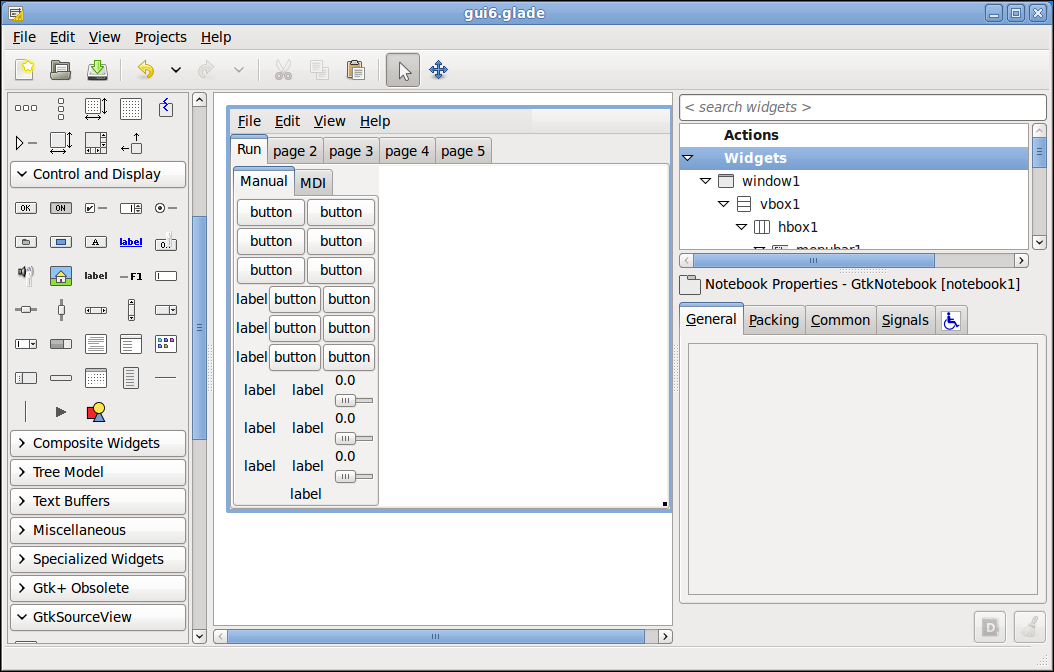
In the top container add a Menu Bar to the left container
-
In the top container add a Tool Bar to the right container.
-
In the 5 tab notebook:
-
Change the Label: on page 1 to Run.
-
Add a HAL Gremlin to the right container of the Run tab and change Use Metric Units to No.
-
-
Select hal_hbox1 from the list and change Expand: to No.
-
In the 2 tab notebook:
-
Change the Label: for page 1 to Manual and page 2 to MDI.
-
-
In the Manual tab:
-
Add a Button to each cell in the top box.
-
Add a Button to the cells in middle and right columns of the middle box.
-
Add a Label to the left column of cells of the middle box.
-
Add a Label to the cells in the left and middle columns of the bottom box.
-
Add a HAL_HScale to the cells in the right column of the bottom box.
-
-
Add labels to each blank page as place holders for now.
Your project should look like this now.
Add Signal Handlers
|
Note
|
Don’t forget to press the Enter key after each signal handler is added. |
-
Add to window1 GtkObject destroy signal the on_window1_destroy handler.
-
Select File > Quit in our GUI and change the Name: to menu_quit
-
Add to menu_quit GtkMenuItem activate signal the on_menu_quit_activate handler.
Don’t forget to save the gui to the installed directory!
sudo cp gui6.glade /usr/share/linuxcnc