Add Action to the GUI
The Python
Well we don’t need to do much so this will be easy. Make a copy of gui1.py and save it as gui2.py. Change gui1 to gui2 in the python file in three places as shown then save the file. The execute permission should have been copied over.
#!/usr/bin/env python

import gtk
import gladevcp.makepins
from gladevcp.gladebuilder import GladeBuilder
import hal

class gui_one(object):

  def on_window1_destroy(self, widget, data=None):
    print "quit with cancel"
    gtk.main_quit()

  def on_gtk_quit_activate(self, menuitem, data=None):
    print "quit from menu"
    gtk.main_quit()

  def __init__(self):
    self.builder = gtk.Builder()
    self.builder.add_from_file("gui2.glade")
    halcomp = hal.component("gui2")
    self.builder.connect_signals(self)
    self.window = self.builder.get_object("window1")
    self.window.show()
    panel = gladevcp.makepins.GladePanel( halcomp, "gui2.glade", self.builder, None)
    halcomp.ready()

if __name__ == "__main__":
  app = gui_one()
  gtk.main()
Start up the Axis sim as before and run gui02.py as before. The screen should pop up like the following and mirror any DRO numbers shown on the Axis screen.
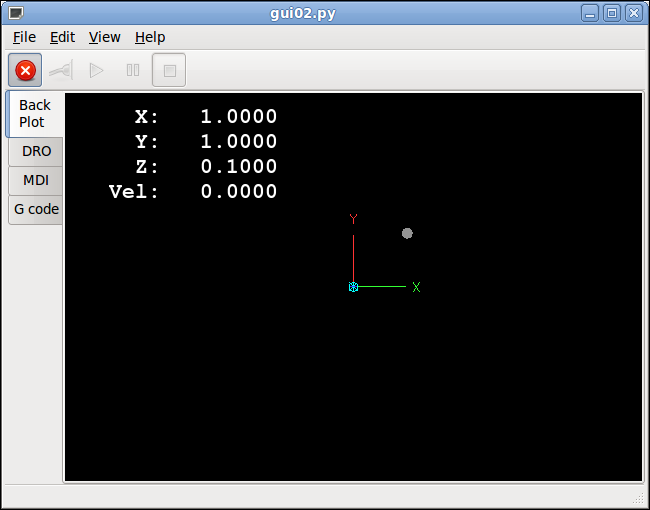
In our custom screen press the E-Stop and Power buttons then in the Axis screen home the simulator. You should see the back plot in both screens move around as it homes.
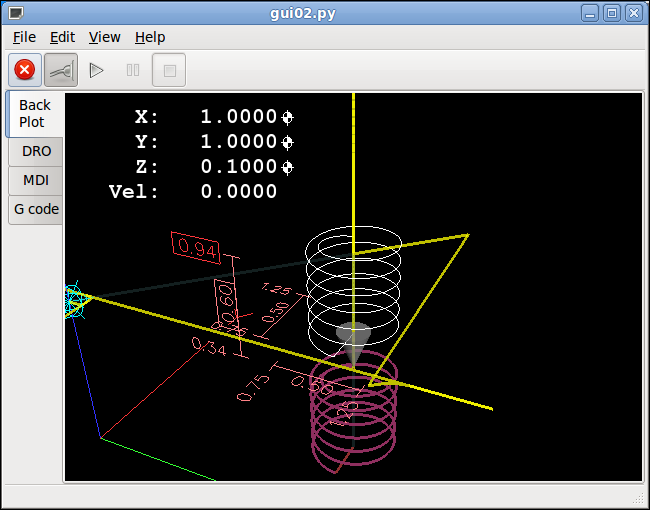
Now back in our custom screen we can use File > Open to select a file to run. If we selected a file that would run in Axis it will run in our custom GUI.
When your finished just close Axis and our Custom GUI will close as well.
Next up running our custom GUI from the INI file without Axis…