Gtk Dialog Box
The Python
We only need to add a few things to our previous example to show the Help About Dialog so lets examine the code we need to add. This line creates an instance of our dialog box using the GtkBuilder.
self.aboutdialog = self.builder.get_object("aboutdialog")As in the first tutorial the first line is connected to our menu item signal. When the menu item is activated the define is called. The second line just prints debugging info. The third line gets an instance of the dialog window using the .run() method. If there was some buttons or something added the response can be tested with an if. The code will wait at the .run() line until you press the Close button then the .hide() method will run to close the Help About dialog box.
  def on_gtk_about_activate(self, menuitem, data=None):
    print "help about selected"
    self.response = self.aboutdialog.run()
    self.aboutdialog.hide()
The following code is the complete python file. In the same directory as the glade2.glade file was saved save the following python code as glade2.py.
#!/usr/bin/env python

import gtk

class Buglump:

  def on_window1_destroy(self, object, data=None):
    print "quit with cancel"
    gtk.main_quit()

  def on_gtk_quit_activate(self, menuitem, data=None):
    print "quit from menu"
    gtk.main_quit()

  def on_gtk_about_activate(self, menuitem, data=None):
    print "help about selected"
    self.response = self.aboutdialog.run()
    self.aboutdialog.hide()

  def __init__(self):
    self.gladefile = "glade2.glade"
    self.builder = gtk.Builder()
    self.builder.add_from_file(self.gladefile)
    self.builder.connect_signals(self)
    self.window = self.builder.get_object("window1")
    self.aboutdialog = self.builder.get_object("aboutdialog1")
    self.window.show()

if __name__ == "__main__":
  main = Buglump()
  gtk.main()
View the Results
Now open up a terminal and cd to the directory where your files are. Type in ls and we can see our files.

Now we will make the glade2.py file executable by changing the mode of the file with chmod command. In the terminal type in chmod +x glade2.py then type in ls again. Notice how the file glade2.py is now displayed in green. This means it is an executable file now and can be executed by adding ./ in front of the file name like this ./glade2.py. The ./ means something like search for the file in the current directory.

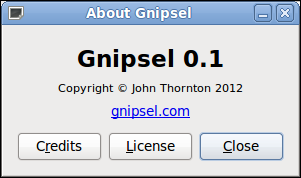
Now type ./glade2.py and our screen pops up… now click on Help > About and our dialog screen pops up. Click on Credits and License to see what pops up when you do.

It was such a struggle to figure this out when the solution was so simple.
That’s all for this one and we still didn’t even say Hello World…